Costs: DIY vs. Professional Framing
DIY Framing Costs
1. Materials:
- Lumber: $4,000 – $10,000 (depending on the amount, size and type)Nails and
- Fasteners: $200 – $500Sheathing: $1,000 – $2,500
- Tools: $500 – $1,500 (for power tools like nail guns and saws)
- Protective gear and miscellaneous supplies: $200 – $300
2. Heavy Equipment Costs:
Ladders and Scaffolding:
- Cost: Buying ladders can range from $150 – $300 each. Scaffolding systems, which provide safer and more versatile platforms, can cost between $500 – $2,000.
- Rental: Renting scaffolding can cost approximately $15 – $50 per day, depending on height and complexity.
Power Tools and Nail Guns:
- Cost: High-quality nail guns can range from $200 – $500. Additional power tools like circular saws, miter saws, and drills can cost $100 – $500 each.
- Rental: Nail guns generally cost $30 – $50 per day, and saws can cost $20 – $50 per day if you choose to rent.
Cranes or Boom Lifts
(if needed for roof trusses and large components):
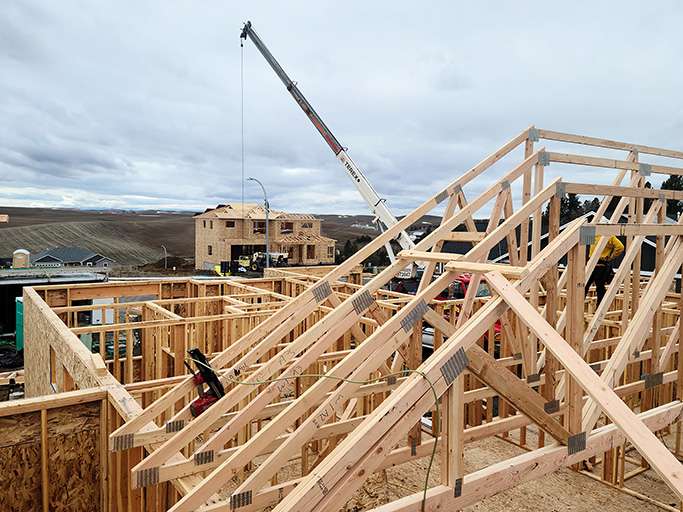
- Cost: Buying small cranes or boom lifts is generally impractical for one-time use, as they can range from $10,000 – $50,000.
- Rental: Renting a small crane or boom lift costs between $200 – $600 per day, or $1,000 – $3,000 per week.
Air Compressors (for pneumatic tools):
- Cost: An air compressor suitable for framing might cost $200 – $500.
- Rental: Renting an air compressor can cost $20 – $50 per day.
Concrete Mixers
(if pouring a new foundation or making adjustments):
- Cost: Portable concrete mixers can cost between $300 – $800.
- Rental: Renting a mixer can cost around $50 – $100 per day.
3. Additional Costs
Building Permits and Inspections:
- Cost: Building permits can range from $500 to $2,000, depending on your location and the complexity of the project.
- Inspections: Additional inspections may be required at various stages, costing $100 to $300 per inspection.
Upgraded Materials:
- Enhanced Lumber: Using premium or treated lumber for increased durability can add $1,000 to $3,000 to your total cost.
- Advanced Fasteners: Upgraded screws, nails, and metal connectors can add $200 to $500.
4. Energy-Efficient Upgrades
Insulated Sheathing:
- Cost: Using insulated sheathing instead of standard plywood or OSB can add $1,000 to $2,000.
High-Quality Weather Barriers:
- Cost: Upgrading to top-of-the-line weather-resistant barriers can add $500 to $1,000.
5. Safety Equipment and Training
Safety Gear:
- Cost: High-quality gloves, goggles, helmets, and harnesses can cost $200 to $500.
Training and Courses:
- Cost: Investing in framing or construction courses can cost $300 to $1,000, improving your skills and ensuring a safer project.
6. Unforeseen Expenses
Buffer for Unforeseen Expenses:
- Cost: Set aside an additional 10-20% of the total budget to cover unexpected costs, ranging from $1,000 to $4,000
Cost Estimate for DIY Framing:
- Basic Materials and Tools: $5,900 – $14,800
- Heavy Equipment Purchase: $2,000 – $5,800
- Heavy Equipment Rental (1 week): $1,875 – $5,100
- Building Permits and Inspections: $600 – $2,300
- Upgraded Materials: $1,200 – $3,500
- Energy-Efficient Upgrades: $1,500 – $3,000
- Safety Equipment and Training: $500 – $1,500
- Buffer for Unforeseen Expenses: $1,000 – $4,000
Total DIY Cost Estimate:
- Including Purchases: $12,200 – $34,900
- Including Rentals (not purchases): $12,075 – $34,200
Professional Framing Costs
- Materials: Usually, professionals purchase in bulk at a discount, but the cost to you will often be similar to DIY material costs.
- Labor: Labor costs for framing a house range between $8,000 – $30,000, depending on the complexity and size of the project.
Cost Comparison Summary
- DIY: $12,075 – $34,900
- Professional: $12,000 – $40,000
Recommendations for Accurate Cost Estimation
Recommendations:
- Local Quotes: Always obtain multiple quotes for materials and labor to ensure you get the best price tailored to your location.
- Budgetary Buffer: Set aside an additional 10-20% above the initial estimate to cover unforeseen expenses.
- Detailed Planning: Develop a detailed project plan to minimize delays, which can lead to increased costs, especially when renting equipment.
Types of Framing Styles
Platform Framing (Western Framing)
- Description: The most common residential construction method in North America. It involves constructing individual floors one at a time.
- Advantages: Easier to manage, allows for versatility in building designs.
- Disadvantages: Can be less stable in areas prone to earthquakes.
Balloon Framing
- Description: An older method where long, continuous framing members run from the foundation to the roof.
- Advantages: Good for multi-story buildings, fewer vertical shrinkage issues.
- Disadvantages: It requires longer, harder-to-source lumber and more challenging fire management.
Timber Framing
- Description: Utilizes heavy timber joined with complex molding and notching techniques.
- Advantages: Extremely strong, aesthetically pleasing, and energy-efficient.
- Disadvantages: More expensive and labor-intensive, requires specialized skills.
Advanced Framing (Optimum Value Engineering)
- Description: A method that reduces lumber use and waste using techniques like in-line framing and raised-heel trusses.
- Advantages: Cost-efficient, environmentally friendly.
- Disadvantages: It may only be familiar to some builders, requiring specialized knowledge.
Steps to Frame a House
1. Preparation and Planning
Site Assessment:
Material Procurement:
Blueprint Review:
2. Laying the Sill Plate
Procedure: Attach treated 2×6 or 2×8 lumber to the foundation using anchor bolts.
Tips: Use a level to ensure accuracy, and apply a protective barrier to prevent moisture damage
3. Building the Floor Frame
Procedure: Lay out and attach rim joists, floor joists, and the subfloor. Attach floor joists to the sill plates using metal joist hangers, ensuring they are evenly spaced and level. The joists provide support for the floor and distribute the weight of the house. After the joists are in place, cover them with plywood or oriented strand board (OSB) subflooring, securing them with nails or screws to prevent squeaking and ensure stability.
Tips: Space joists consistently (typically 16 inches on-center). Use a chalk line for straight lines.
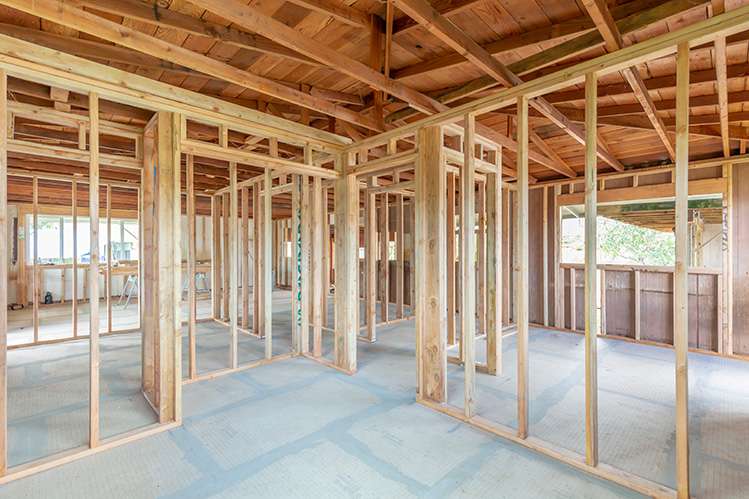
4. Constructing the Walls
Procedure:
Build wall sections on the ground, then raise them into place.
- Construct wall frames on the ground using studs, top plates, and bottom plates.
- Include openings for windows and doors, reinforcing them with headers for added strength.
- Once the frames are constructed, lift them into place and secure them to the sill plates.
- Use braces to keep the walls plumb and level, which is crucial for the house’s overall stability and appearance.
Tips: Pre-cut studs for consistency, use a framing square for perfect angles and ensure the top and bottom plates of the walls are securely nailed.
5. Installing Ceiling Joists and Roof Trusses
Procedure: Place ceiling joists across wall tops, followed by the roof trusses or rafters.
Tips: Space trusses as per your blueprint (usually 24 inches on-center). Secure each truss with appropriate metal connectors for extra strength.
6. Sheathing and Bracing
Procedure: Nail plywood or OSB sheathing to wall and roof frames. Sheathing and wrapping the exterior walls add structural strength and weather protection. Start by attaching plywood or OSB sheathing to the exterior wall frames, ensuring proper alignment and securing with nails. Next, cover the sheathing with a weather-resistant barrier like Tyvek, which protects the house from moisture while allowing the walls to breathe. Seal all seams and openings to prevent water infiltration, which can cause significant damage over time.
Tips: Leave a small gap between sheets to account for expansion. Use horizontal braces to stabilize walls.
7. Weatherproofing
Procedure: Apply a weather-resistant barrier (like Tyvek) over sheathing.
Tips: Overlap seams to ensure no water intrusion and cover all exposed wood.
8. Inspect and Adjust
Procedure: Check the entire frame for alignment, squareness, and stability.
Tips: Use a level and a plumb bob to ensure walls and corners are straight and plumb.
Time Required to Frame a House
The time required to frame a house depends on several factors, including the size and complexity of the house, weather conditions, and the experience of the construction crew. On average, framing a house can take:
- Small house (1,000-1,500 sq ft): 1-2 weeks
- Medium house (1,500-2,500 sq ft): 2-3 weeks
- Large house (2,500+ sq ft): 3-4 weeks
Top Professional Tips for Successful Framing
- Precision Measuring: Double-check every measurement to avoid costly mistakes. “Measure twice, cut once” is a framing mantra.
- Quality Materials: Use kiln-dried, high-quality lumber to prevent warping and shrinking.
- Proper Fastening: Use screws and metal connectors for extra strength in key areas, such as corners and roof trusses.
- Safety First: Always wear protective gear, including gloves, safety glasses, and a hard hat.
- Use a Speed Square: It’s essential for quick, accurate measurements and cuts.
- Consistent Nailing: To ensure structural integrity, practice consistent nail spacing (typically every 16 inches).
- Pilot Holes for Screws: When using screws, drill pilot holes to prevent wood from splitting.
- Keep it Clean: A clean worksite reduces the risk of accidents and makes it easier to work efficiently.
Conclusion
Framing a house is undeniably complex, whether opting for a DIY approach or hiring professionals. Understanding the costs, different framing methods, and step-by-step procedures is vital for a successful project. With meticulous planning and precise execution, you can ensure your home’s frame provides a solid foundation for years.
For those who need additional support or professional advice, contacting Coats Construction Concepts can make a significant difference. Their experienced team can offer guidance and practical assistance, ensuring your project meets the highest quality and safety standards.
For further reading and references, consider the following sources:
- 101 Guide to House Framing
- Your Step-By-Step Guide to House Framing
- How to Frame a House: A Step-by-Step Guide
- Everything You Need To Know About House Framing
Combining detailed steps with professional tips and expert advice from Coats Construction Concepts can help you achieve a successful and sturdy house framing project.
